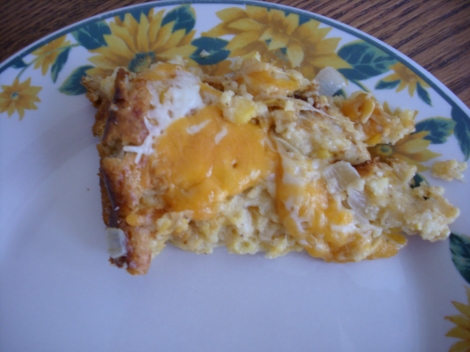
Cheesy Corn Spoon Bread

I made barbecue chicken today and thought this would be the perfect accompaniment.  Plus, I have an overabundance of cream corn to use up because my husband accidentally bought a case of it thinking it was regular corn, and he doesn’t like it by itself.  I found this recipe on Kittencal’s Kitchen.  She makes some pretty great stuff, so I go to her website often for recipes.  This spoon bread was really good.  The recipe originally included jalapeno.  I left it out as my hubby doesn’t like anything hot, but I’m sure it would be great with it.

Picture 035

Cheesy Corn Spoon Bread (Adapted from Kittencal’s Kitchen)

Ingredients

  • 1/3 c butter
  • 1 medium onion, chopped
  • 3 garlic cloves, minced
  • 2 large eggs
  • 2 c sour cream (one 16-ounce container)
  • 1 (15-ounce) can corn kernels, drained
  • 1 (14-3/4 ounce) can cream-style corn
  • 1 (8-1/2 ounce) package corn bread/muffin mix
  • 1/2 t seasoned salt
  • fresh ground black pepper, to taste
  • 3 c shredded cheddar cheese

Directions

1.  Preheat oven to 375 degrees F and grease a 3-quart casserole dish.

2.  In a small skillet heat butter over medium-high heat.  Add in onion; saute until softened (about 3-4 minutes).  Add in garlic and saute for 2 minutes; set aside.

3.  In a bowl beat eggs for about 2 minutes.  Mix in sour cream, corn kernels and cream-style corn until blended.  Using a wooden spoon stir/mix in the corn bread/muffin mix and 1/2 teaspoon salt.  Fold in onion/garlic mixture and 2 cups cheddar cheese.  Season with fresh ground black pepper (use as much black pepper as you like).  Transfer to casserole dish.

4.  Bake uncovered for 35-40 minutes or until a toothpick inserted in the center comes out clean.  Immediate sprinkle 1 cup cheddar cheese on top and allow to melt.

Published in: on May 31, 2009 at 7:02 pm  Comments (10)  

Creamy Macaroni and Cheese

Another of my favorite food magazines is Cook’s Country.  It’s a spin off of another great magazine, Cook’s Illustrated.  Cook’s Country is full of great recipes and helpful hints.  I found this recipe in the April/May 2009 edition.  It was a make-ahead recipe meant to be frozen and baked later, but I made and served it immediately.  It was delicious!  The garlic-flavored bread crumbs were a great addition.

DSCI0054 (2)

Creamy Macaroni and Cheese (Courtesy of Cook’s Country)

Ingredients

  • 4 slices hearty white sandwich bread, torn into pieces
  • 1/4 c grated parmesan cheese
  • 1 garlic clove, minced
  • 8 T unsalted butter, melted
  • salt and pepper
  • 1 lb elbow macaroni
  • 6 T all-purpose flour
  • 1 t dry mustard
  • 1/8 t cayenne pepper
  • 4 1/2 c low-sodium chicken broth
  • 1 1/2 c heavy cream
  • 4 c shredded colby cheese
  • 2 c shredded extra-sharp cheddar cheese

Directions

1.  Preheat oven to 375 degrees. 

2.  Pulse bread, parmesan, garlic, and 2 T butter in food processor until coarsely ground.  Set aside.

3.  Cook pasta according to package directions and drain.

4.  Heat remaining butter, flour, mustard, and cayenne in pot over medium-high heat, stirring constantly, until golden and fragrant, 1 to 2 minutes.  Slowly whisk in broth and cream and bring to a boil.  Reduce heat to medium and simmer until slightly thickened, about 15 minutes.  Off heat, whisk in colby, cheddar, 1 t salt, and 1/2 t pepper until smooth.

5.  Combine the macaroni with the sauce.  Divide the mixture between two greased 8 inch baking dishes.  Divide the crumb topping in half and sprinkle on top of the two dishes.

6.  Bake about 30 to 40 minutes or until the crumbs are golden brown.  Let cool 10 minutes.

Published in: on May 24, 2009 at 7:17 pm  Comments (5)  

Cheddar-Topped Shepherd’s Pie

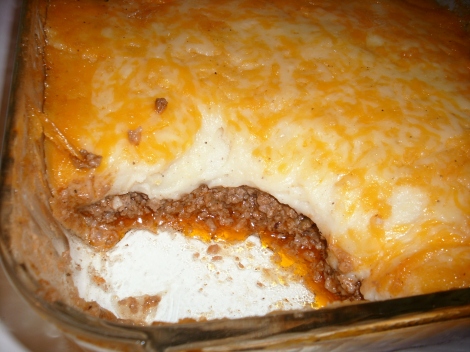
One of my favorite food magazines is Everyday Food.  Martha Stewart may be an ex-felon, but I still love her stuff.  I always find delicious recipes to try in this magazine.  I found this particular one in the October 2008 issue.  It’s definitely comfort-type food!  While it’s delicious straight from the oven, I think it tastes even better the next day.  I used a whole lot more cheese than the recipe called for (you know about my unhealthy addiction to cheese), but otherwise, I followed the recipe exactly.

 DSCI0055 (2)

Cheddar-Topped Shepherd’s Pie (Courtesy of Everyday Food)

  • 2 pounds baking potatoes (about 4), peeled and thinly sliced
  • Coarse salt and ground pepper
  • 1 tablespoon vegetable oil, such as safflower
  • 6 medium carrots, halved lengthwise, quartered if large, and thinly sliced
  • 6 celery stalks, thinly sliced
  • 1 large onion, chopped
  • 1/2 teaspoon dried thyme
  • 1/4 cup all-purpose flour
  • 1/4 cup tomato paste
  • 2 pounds ground beef chuck
  • 1 cup whole milk
  • 3 cups shredded sharp cheddar
  • Directions

    1.  Preheat oven to 450. Place potatoes in a large saucepan, and cover by 1 inch with salted water. Bring to a boil; reduce to a simmer. Cook until potatoes are easily pierced with the tip of a paring knife, 15 to 20 minutes.

    2.  Meanwhile, heat oil in a 5-quart Dutch oven or heavy pot over medium-high. Add carrots, celery, onion, and thyme. Cook, stirring occasionally, until vegetables are tender, 8 to 10 minutes. Add flour and tomato paste; cook, stirring, 1 minute. Add beef; cook, stirring occasionally, until no longer pink, 6 to 8 minutes. Add 1 cup water; bring to a boil, and simmer 1 minute. Set beef filling aside.

    3.  Drain potatoes; return to pan. Cook over medium, stirring, until liquid has evaporated and a thin film covers bottom of pan, about 1 minute. Remove pan from heat; add milk and 1 cup cheese. Mash until smooth; season cheddar-potato topping with salt and pepper.

    4.  Pour beef filling into a 13-by-9-inch baking dish. Drop dollops of topping over filling; spread to edges with a spatula.  Sprinkle with remaining 1/2 cup cheese. Bake until topping is browned and filling is bubbling rapidly, about 20 minutes (if topping and filling were chilled, increase to 35 minutes). Let stand 5 minutes before serving.

    Published in: on May 24, 2009 at 5:03 pm  Comments (6)  

    May 2009 Daring Cooks’ Challenge – Zuni Ricotta Gnocchi

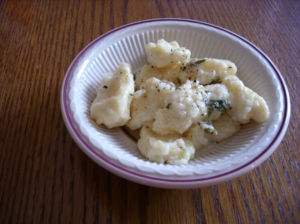
    This month is the first ever Daring Cooks’ Challenge.  The Daring Cooks are a group that’s a spinoff of the awesome Daring Bakers.  When I heard a new group being formed that was devoted to cooking, I knew I had to join.  The hosts this month were the founders of the Daring Bakers and Cooks, Ivonne of Cream Puffs in Venice and Lis of La Mia Cucina.  They chose a recipe from the cookbook by Judy Rodgers, named after her restaurant, The Zuni Cafe Cookbook.  The ricotta gnocchi only contain a few ingredients, but there was a bit of preparation involved.  I used whole milk ricotta and drained it overnight according to the recipe.  When I pulled it out the next day, it was still quite wet.  Oh crap.  I blotted it with paper towels and hoped for the best.  I proceeded to make the “test” gnocchi, which ended up holding together while I cooked it, but the texture was, well, kinda flabby.  Ewww.  I added about a 1/4 to 1/2 a cup of flour to the mix and formed the rest of the gnocchi.  The flour helped immensely by firming up the texture.  They were still light and delicate.  I browned a stick of butter and added about a tablespoon of fresh, chopped sage.  The combination was great!  My husband liked them even though he proclaimed them “weird looking.”  I’d have to agree.  I could’ve been more careful and precise when forming them, but I started to get impatient.  Would I make these again?  Maybe…they weren’t hard to make by any means, but the did take a while to form.  Thanks to Ivonne and Lis for hosting the first Daring Cooks’ Challenge!
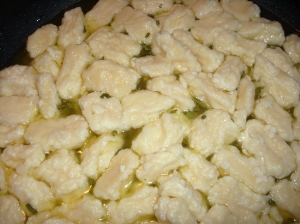
    DSCI0036 (2)


    DSCI0039 (3)


    Ingredients

    For the gnocchi:

    • 1 pound fresh ricotta (2 cups)
    • 2 large cold eggs, lightly beaten
    • 1 T unsalted butter
    • 2 or 3 fresh sage leaves, or a few pinches of freshly grated nutmeg, or a few pinches of chopped lemon zest (all optional, I didn’t add any of these.)
    • ½ oz Parmigiano-Reggiano, grated (about ¼ cup very lightly packed)
    • about ¼ t salt (a little more if using kosher salt)
    • all-purpose flour for forming the gnocchi

    For the gnocchi sauce:

    • 8 T butter, sliced
    • 1 T chopped, fresh sage

    Directions

    Step 1 (the day before you make the gnocchi): Preparing the ricotta.

    If the ricotta is too wet, your gnocchi will not form properly. In her cookbook, Judy Rodgers recommends checking the ricotta’s wetness. To test the ricotta, take a teaspoon or so and place it on a paper towel. If you notice a very large ring of dampness forming around the ricotta after a minute or so, then the ricotta is too wet. To remove some of the moisture, line a sieve with cheesecloth or paper towels and place the ricotta in the sieve. Cover it and let it drain for at least 8 hours and up to 24 hours in the refrigerator. Alternatively, you can wrap the ricotta carefully in cheesecloth (2 layers) and suspend it in your refrigerator for 8 to 24 hours with a bowl underneath to catch the water that’s released. Either way, it’s recommended that you do this step the day before you plan on making the gnocchi.

    Step 2 (the day you plan on eating the gnocchi): Making the gnocchi dough.

    To make great gnocchi, the ricotta has to be fairly smooth. Place the drained ricotta in a large bowl and mash it as best as you can with a rubber spatula or a large spoon (it’s best to use a utensil with some flexibility here). As you mash the ricotta, if you noticed that you can still see curds, then press the ricotta through a strainer to smooth it out as much as possible.

    Add the lightly beaten eggs to the mashed ricotta.

    Melt the tablespoon of butter. As it melts, add in the sage if you’re using it. If not, just melt the butter and add it to the ricotta mixture.

    Add in any flavouring that you’re using (i.e., nutmeg, lemon zest, etc.). If you’re not using any particular flavouring, that’s fine.

    Add the Parmigiano-Reggiano and the salt.

    Beat all the ingredients together very well. You should end up with a soft and fluffy batter with no streaks (everything should be mixed in very well).

    Step 3: Forming the gnocchi.

    Fill a small pot with water and bring to a boil. When it boils, salt the water generously and keep it at a simmer. You will use this water to test the first gnocchi that you make to ensure that it holds together and that your gnocchi batter isn’t too damp.

    In a large, shallow baking dish or on a sheet pan, make a bed of all-purpose flour that’s ½ an inch deep.

    With a spatula, scrape the ricotta mixture away from the sides of the bowl and form a large mass in the centre of your bowl.

    Using a tablespoon, scoop up about 2 to 3 teaspoons of batter and then holding the spoon at an angle, use your finger tip to gently push the ball of dough from the spoon into the bed of flour.

    At this point you can either shake the dish or pan gently to ensure that the flour covers the gnocchi or use your fingers to very gently dust the gnocchi with flour. Gently pick up the gnocchi and cradle it in your hand rolling it to form it in an oval as best as you can, at no point should you squeeze it. What you’re looking for is an oval lump of sorts that’s dusted in flour and plump.

    Gently place your gnocchi in the simmering water. It will sink and then bob to the top. From the time that it bobs to the surface, you want to cook the gnocchi until it’s just firm. This could take 3 to 5 minutes.

    If your gnocchi begins to fall apart, this means that the ricotta cheese was probably still too wet. You can remedy this by beating a teaspoon of egg white into your gnocchi batter. If your gnocchi batter was fluffy but the sample comes out heavy, add a teaspoon of beaten egg to the batter and beat that in. Test a second gnocchi to ensure success.

    Form the rest of your gnocchi. You can put 4 to 6 gnocchi in the bed of flour at a time. But don’t overcrowd your bed of flour or you may damage your gnocchi as you coat them.

    Have a sheet pan ready to rest the formed gnocchi on. Line the sheet pan with wax or parchment paper and dust it with flour.

    You can cook the gnocchi right away, however, Judy Rodgers recommends storing them in the refrigerator for an hour prior to cooking to allow them to firm up.

    Step 4: Cooking the gnocchi.

    Have a large skillet ready to go. Place the butter and water for the sauce in the skillet and set aside.

    In the largest pan or pot that you have (make sure it’s wide), bring at least 2 quarts of water to a boil (you can use as much as 3 quarts of water if your pot permits). You need a wide pot or pan so that your gnocchi won’t bump into each other and damage each other.

    Once the water is boiling, salt it generously.

    Drop the gnocchi into the water one by one. Once they float to the top, cook them for 3 to 5 minutes (as in the case with the test gnocchi).

    When the gnocchi float to the top, you can start your sauce while you wait for them to finish cooking.

    Place the skillet over medium heat and melt the butter. Swirl it gently a few times as it melts. Heat until the butter turns a light brown color, add the sage, and turn off the heat. Your gnocchi should be cooked by now.

    With a slotted spoon, remove the gnocchi from the boiling water and gently drop into the butter sauce. Carefully roll in the sauce until coated. Serve immediately.
    Published in: on May 14, 2009 at 4:21 pm  Comments (10)  

    Gingersnaps

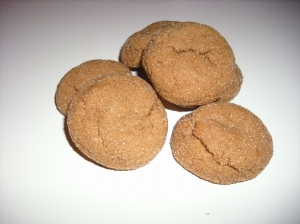
    Gingersnaps are one of those treats that gives me the warm, fuzzies inside (lame I know).  My grandma, who passed away quite some time ago, used to make these all the time when I was growing up.  Whenever I make them, they remind me of her.  I used fresh, grated ginger instead of ground ginger for an extra kick.  Use as much or as little as you like cause it can get kinda spicy!  These really taste better the day after making them.  I find it really hard not to devour them right away, though.

    DSCI0048 (3)


    Gingersnaps (Courtesy of Recipezaar)

    Ingredients

    • 2 1/4 c flour
    • 2 t grated ginger (or less if desired)
    • 1 t baking soda
    • 3/4 t cinnamon
    • 1/2 t clove
    • 1/4 t salt
    • 3/4 c butter or margarine
    • 1/2 c brown sugar
    • 1/4 c white sugar
    • 1 egg
    • 1/4 cup molasses
    • 1/2 cup sugar (separate for rolling cookies in)

    Directions

    1.  Preheat oven to 350 degrees.

    2.  Combine dry ingredients and set aside.

    3.  In a large bowl beat butter till soft, gradually add sugars.

    4.  Beat in egg and molasses.

    5.  Stir in flour mixture.

    6.  Roll into balls, then roll in sugar.

    7.  Bake 10- 12 minutes.

    Published in: on May 12, 2009 at 7:55 pm  Comments (10)